Wednesday, August 15, 2012

Technique Blog Hop

If you are joining us from Wendy's blog, you are in the right place!
This month we are focusing on using negative images to embellish. This technique is found on page 92 of the new Close to My Heart Idea Book.

Negative images are made with the left overs from a Cricut cartridge cut. When I cut these flowers for another card, I was left with the outline. So, I used them on a fun card for a friend who is having a tough time. I like how you can layer patterns and solids with this method. I am always hesitant to use multiple patterns- this way it is broken up by a solid which makes it easier on my eyes!It would even be fun to stamp in the image.

Now head on over to Michelle's blog to check out her take!

Monday, July 16, 2012

Technique Blog Hop


If you are joining us from Shirley's blog: http://momnmescrap.blogspot.com you are in the right place!This month our group is focusing on the technique called Perfect Clusters. It is a way to add depth and texture to your layouts. I used Cherry O paper to scrap our Disney pictures of the Rockin Roller Coaster. I loved how the reds worked together. My perfect cluster uses "You Rock" stamps to add a base stamp, then a sentiment raised with pop dots, and finally bitty brads to add some more texture. I like how the three working together makes a statement on the page. Try it out!

Now go check out Tonya: http://heartandsoulscrappers.blogspot.com

Thursday, July 5, 2012

A Great Show!


My son's school put on an amazing show this spring for their end of year performance. They did a Saturday Night Live theme and we had a blast watching this group of kids perform. Here is their cast photo-I'm planning on doing a DFW Performing Arts Conservatory scrapbook so my son has a record of all his school years there. I used Making the Grade paper- love these colors!

Sunday, July 1, 2012

Dance Decorations


I had a lot of fun helping to put together the decorations for PAC's end of year dance. They were a family affair as I needed help to get them finished! The buckets represent all the fine arts- drama, dance, vocal and singing. The party was held at an amazing room called The Ultra Lounge at Uptown Theater in Grand Prarie.

Monday, April 23, 2012

Thank you card


I just love kraft paper! I'm not really sure why but it might be that it work well with everything. This card speaks to my love of craft and of red...fun to make.

Saturday, April 21, 2012

Use your Stash Blog Hop


Welcome! If you are joining us from Tonya's blog you are in the right place!
Our focus for April is ribbon! I've been working on Disney pictures and had some fun using sunset ribbon as an accent. This is Lucky paper- one of my favorites. I used the sunset mini medley for the ribbon and metal photo clips and but then added some bronze sliders (from the bronze mini medley) for some contrast. I love how the orange stands out with the darker colors. This was my husband's favorite ride but I have to say, I was the one too chicken to do it!

Now head on over to Judy Faye to check out what she did!

Sunday, April 15, 2012

April Technique Hop


Hello everyone! If you are joining us from Kimberly's blog at http://crazy4scrappin.blogspot.com you are in the right place to continue with the technique hop.

This month we focused on the window layering technique found on page 33 of the idea book. Since one of my favorite people is turning seven this week, I made a birthday card for her! I used Sweet Leaf paper for the base card, vanilla cream for the layer and cotton candy ink. The polka dots inside the present were random stamped using the "Hit the Spot" stamps while the letters are the "Polka Dot Alphabet." Then, I finished the card off with sparkles- every girl loves a little bling!

Now head over to Rachel's blog at http://thehappyscrappinsquad.blogspot.com to check out her creation!

Thursday, March 15, 2012

Technique Blog Hop


Hello all! If you are joining us from Bethany's blog at scrappingrandmabethany.blogspot.com then you are in the right place!

This month's technique focus is using your B&T (background and texture) paper as an embellishment. This technique is focused on page 21 of the latest Idea Book! If you don't have an Idea Book and want one, please let me know!

I made this layout of my son and two friend's visiting the Fire Station using Roxie paper. One of the papers has printed flowers so I cut a few out to add a little something to the layout.
One I used on the corner of the picture and the other I used as a dress up for the journaling tag. This is a great way to use paper you already have to add to what you are creating!
The letters are cut at 2 inches with the CTMH Art Philosophy Cricut cartridge (love this font!) and the pins are from the CTMH Bling Assortment.

Now, head on to JudyFaye's blog to see her take on this technique! http://judyfaye.blogspot.com

Tuesday, February 21, 2012

Use your Stash Blog Hop


If you are joining us for the "Use Your Stash Blog Hop" you are right on track. You should be coming from Wendy's blog at http://MyScrapbookingBlog.com

WELCOME! This month we are featuring buttons and flowers. If you get lost along the way you can see the entire list of hoppers on http://thehappyscrappinsquad.blogspot.com. Let's get started.

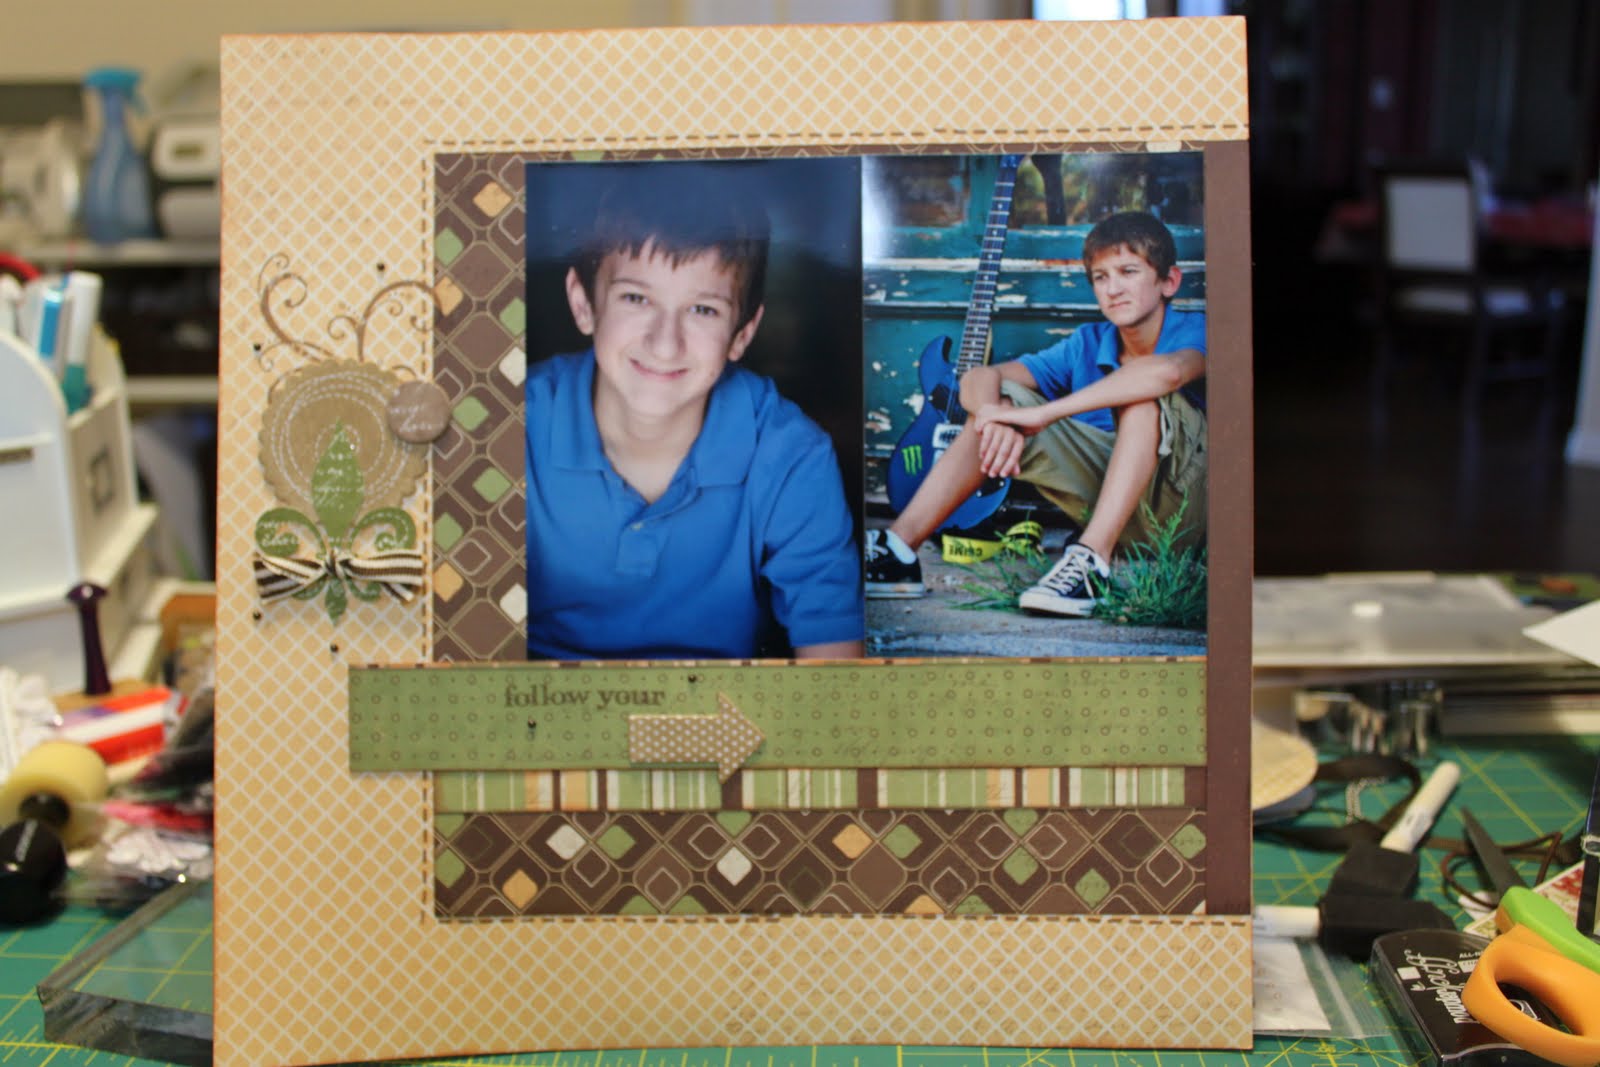
This is a layout of one of my absolute favorite pictures of my son. It was taken at Disney World while waiting in line.

I used CTMH's "You Rock" paper because I love the colors. The chipboard accents are inked and then buttons are used to enhance and add more texture. I really like the colors all mixed and matched.

Now hop on over to Cheri's blog at http://www.craftwithfeeling.blogspot.com for more ideas of using up your stash.

Friday, January 20, 2012

Use your Stash Blog Hop!

Hello! If you are coming from Joy's blog at www.studiowow-joy.com you are in the right place!
Here is a layout I made with a pattern from Reflections and "It's aGuy Thing" paper. I am in love with this paper and have tons of it. Iam trying hard to CONSUME and not CONSERVE! I love how this pattern got a lot of pictures in of various sizes and how the pictures were offset by the great colors. Now, head on to Michelle's blog at http://michelleshandmadeworld.blogspot.com
Enjoy!


Sunday, January 15, 2012

Use it or Lose It


My goal is to start using all my stuff that I have accumulated and to try new patterns! Here is one of my new favorite layouts! I used scraps of patterned paper I had, a layout from Reflections (one of Close to My Heart's great pattern books) and then pictures I have never scrapped of my son. The edges of the squares are distressed and then I added some bitty crystals for fun.

Saturday, January 14, 2012

Use it or Lose it!


My goal is to start using the huge amount of supplies I have on hand and to finish some projects! This layout was made with Close to My Heart's "You and Me" kit. I love how it fits in with my son's new dreams...the pictures were taken by the amazing Laura Veno (Laura Veno photography: lauraveno.com) this summer and I am still in love with them!

Project Night


I have a great bunch of ladies that get together once a month to do a crafty project. This month, we did Valentine's wreaths using Close To My Heart's Art Philosophy Cartridge. The flowers were cut from random red, pink, and patterned paper at 3 inches and 2 and 1/4 inches. The finished products are beautiful and look amazing hung just about anywhere. The examples shown were hung on front doors.


I had a request for instructions so I am adding them! First cut a lot of lowers from Close to My Heart's Art Philosophy Cart. This is the flower that is attached the the fleur de lis cut and it is cut at 3 inches.


Then, begin rolling your flower. The color you want to see rolls to the inside! Start on a skewer and roll the paper right on top of itself. The tighter you roll, the tighter the flower will be.


Roll down to the base. This will hold the flower up. Make sure you do not roll the base!


Let the flower go. It will loosen up and look more realistic. If your middle is too tight, twist the middle paper to the left to loosen it up.


Now you are ready for glue. Put a generous amount of liquid glass on the base. Push the flower down and hold for a moment or two.


Now you have a finished flower! For the wreath, I suggest getting a group done, then gluing. Smush the flowers together because the more full the wreath is, the better it looks. Start with the flowers cut at 3 inches and then fill in with the flowers cut at 2 1/4

Sunday, January 8, 2012

Rock On!

My son is going to a 16th birthday party...I made this tag with "You Rock" stamps. I used a regular tag and added Kraft for more depth and color.

Happy Birthday

I needed a "masculine" birthday card this week so this one is made with background stamping and in blue...

A fun thank you

A cute thank you card made with Grace paper and "A Little Birdie" stamps